Warning: preg_replace(): The /e modifier is deprecated, use preg_replace_callback instead in ..../includes/class_bbcode.php on line 2958 DIY Intercooler pipe beading tool
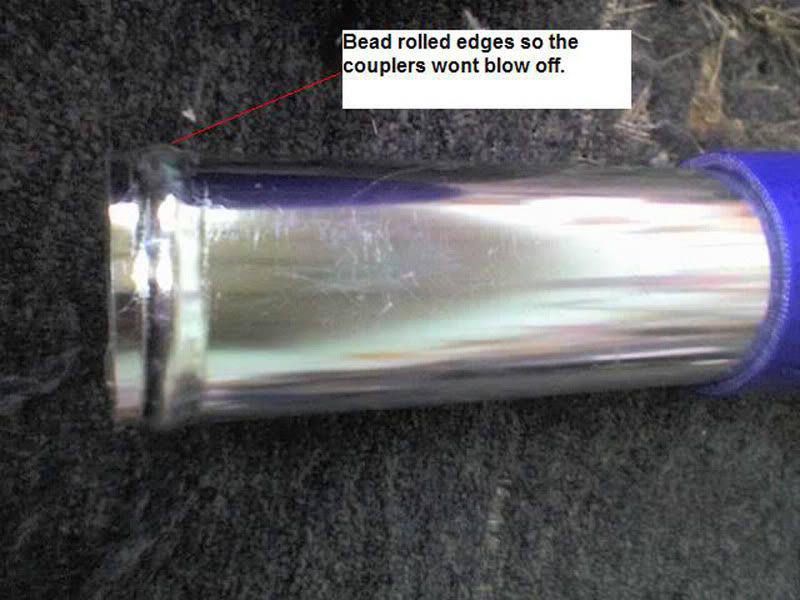
I came across this while 'cruising' the internet, so I can't take any credit for it. But given that some of our members here are into custom fabrication, I thought I'd share what looks like a very effective - and inexpensive - way of creating a intercooler pipe bead.
Required Materials
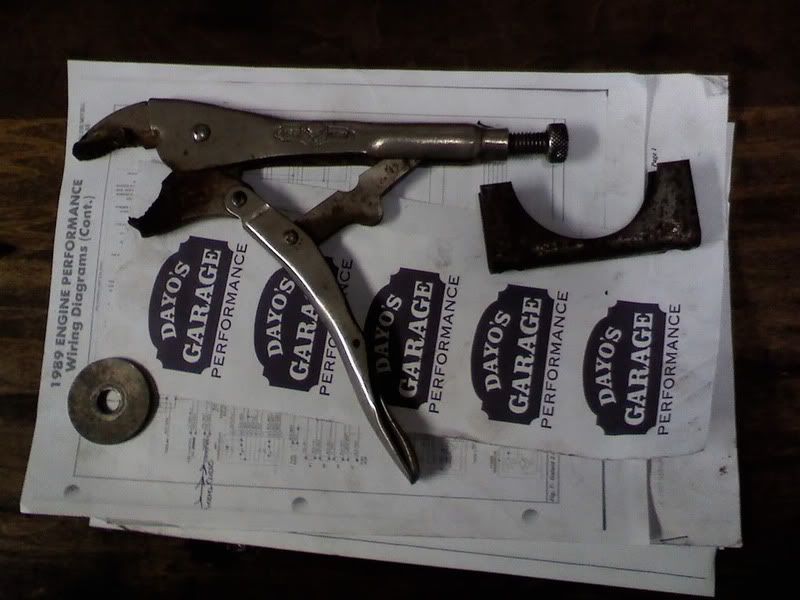
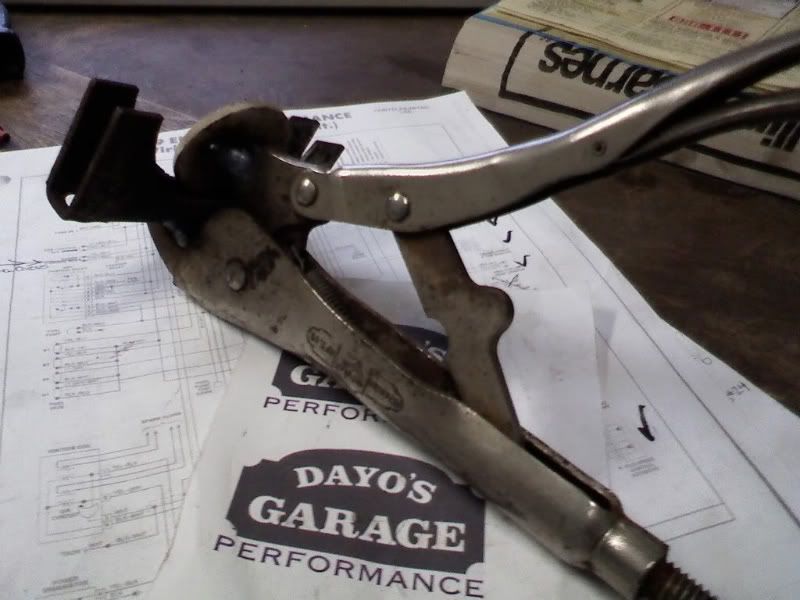
One (1) standard-sized pair of Vice-Grip (or equivalent) pliers; preferably an old set that is expendable
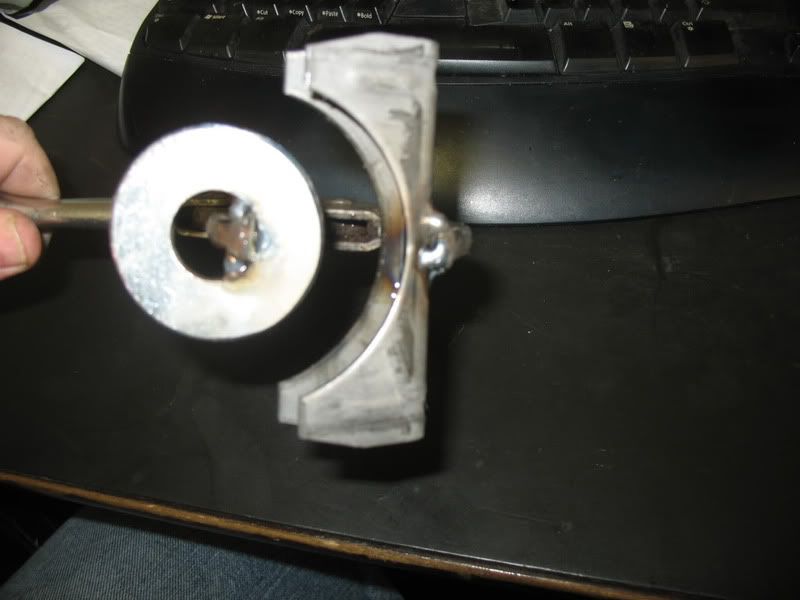
One (1) 2.5" exhaust pipe/muffler clamp saddle; a larger or smaller saddle can be used depending to the size/diameter of the piping to be beaded
One (1) large (thick) washer; washer outside diameter should be less than the saddle diameter
Access to metal cutting/grinding, and welding equipment will also be necessary.
The image below shows the basic items required to make this tool:
Before beginning it is best to round the edges of the washer using a grinder. This will prevent gouging the pipe when creating a bead, which is very important when working with soft metals like aluminum.
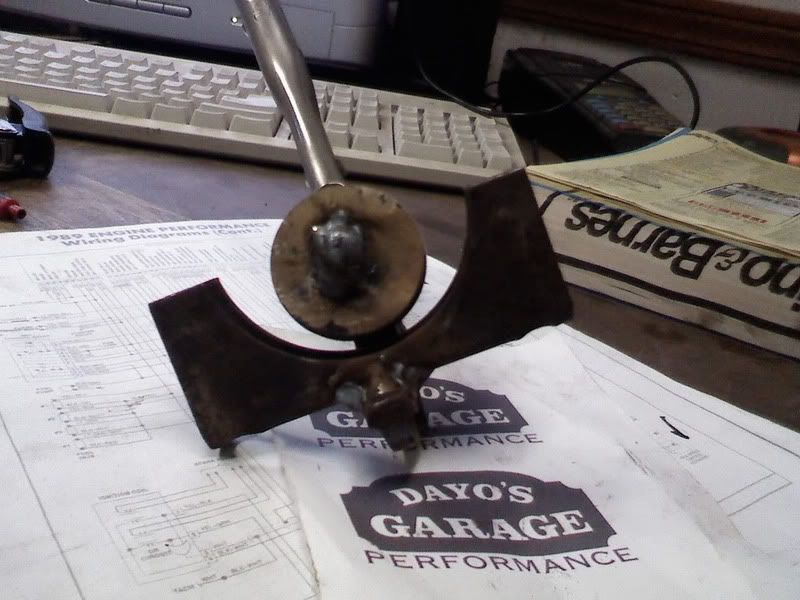
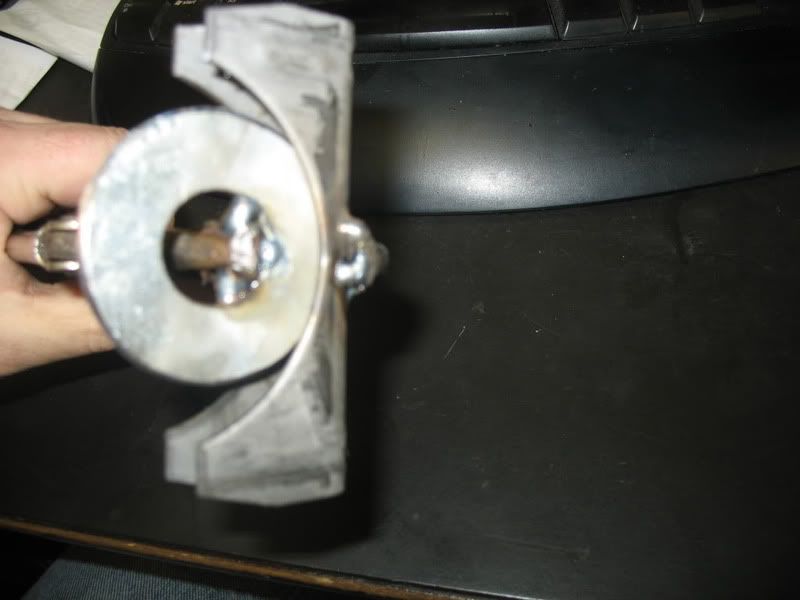
To start, weld the washer to the lower jaw of the pliers. This may require some cutting and/or grinding of the pliers' lower jaw to accept the washer, depending on the size of the washer hole.
Next, weld the flat edge of the saddle clamp to the pliers' upper jaw. Ensure that you position the saddle on the plier jaw so the washer fits centered within the saddle. It's a good idea to grind the jaw of the vise grip in a manner that will provide a stop edge for a quick accurate bead placement. But be careful - if the stop is too close to the pivot of the pliers, the bead will be too close to the edge of the pipe. Too far, and you won't have much leverage when creating the bead itself (which is important when working with steel piping).
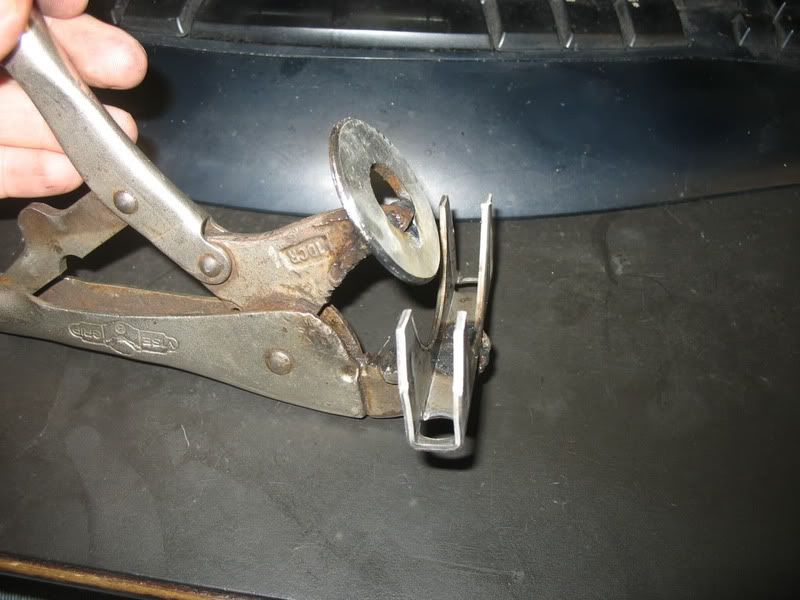
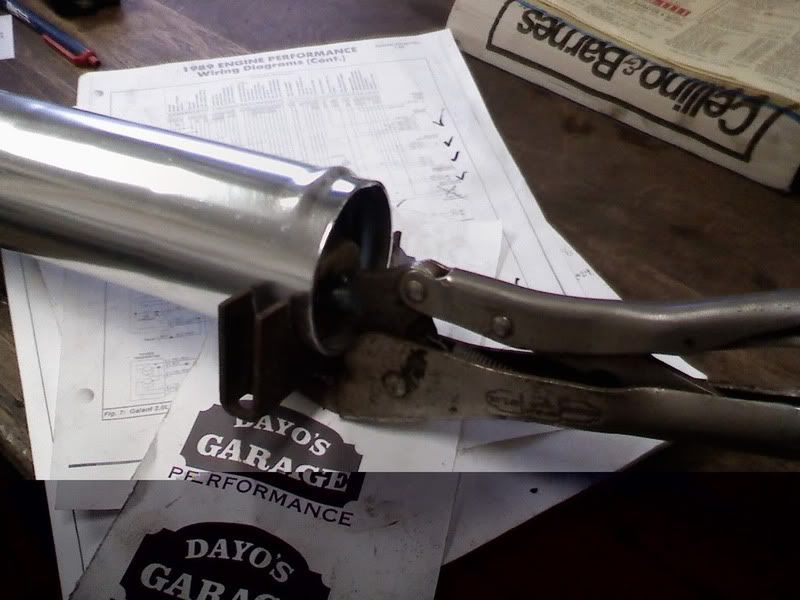
Test your new tool using a scrap piece of piping. Turn the adjuster bolt to select how deep of a bead you want. With careful placement, you can use this tool to flare (or flange) the end of a pipe by not sliding it onto the tool all the way.
Work your way around the diameter of the pipe until the bead is done. You can repeat the process if you find the bead isn't deep enough by simply tightening the adjuster bold slightly and working your way around the pipe again.


 Reply With Quote


Bookmarks