
Nice pic's by the way Michael!


Nice pic's by the way Michael!


How did you remove the bearing after you applied heat to it? Did you use a puller of some kind?Originally Posted by JPJP

Michael
www.superchargerhelp.com
Thanks. I have been taking photos throughout the disassembly and plan to put together a complete "How-To" rebuild guide as a separate post which I'll make a sticky in this section.
But my intentions are more than just rebuilding my SN and putting together a how-to guide. I'm working on a little "surprise" which I'll unveil to everyone shortly. ;)
Michael
www.superchargerhelp.com
It will slide right off. I heated it up w/ a propane torch and kept tapping the shaft every so often till it slid off. When I went for the second one it seemed I had expanded the shaft too much so I let it cool and heated up the second bearing the second day. I also started with the assembly cold (from the freezer) and tried to keep the heat concentrated on the inner race rather than the shaft.
pavement pounde, thank you for posting the link to your rebuild. Your pic's were inaccessible for quite some time thru photobucket. I had printed them out however and used them as reference during my rebuild.


Yeah, I keep it unlocked now.
Greets, Marco
'91 Chevy 496SS, Edelbrock Pro-flo 2 injection, alu. GMPP heads, blowercam, coolmist water injection, turbo in the works.
*VIDEO* http://www.youtube.com/watch?v=6ZOdXg0TOdw
I've FINALLY managed to get the two bearings (and oil pump) off the main drive shaft!
I tried JPJP's suggestion of applying heat to the bearings in the hopes that they would just slide off the main shaft. Unfortunately, that didn't happen, even after applying so much heat that I couldn't touch the shaft.
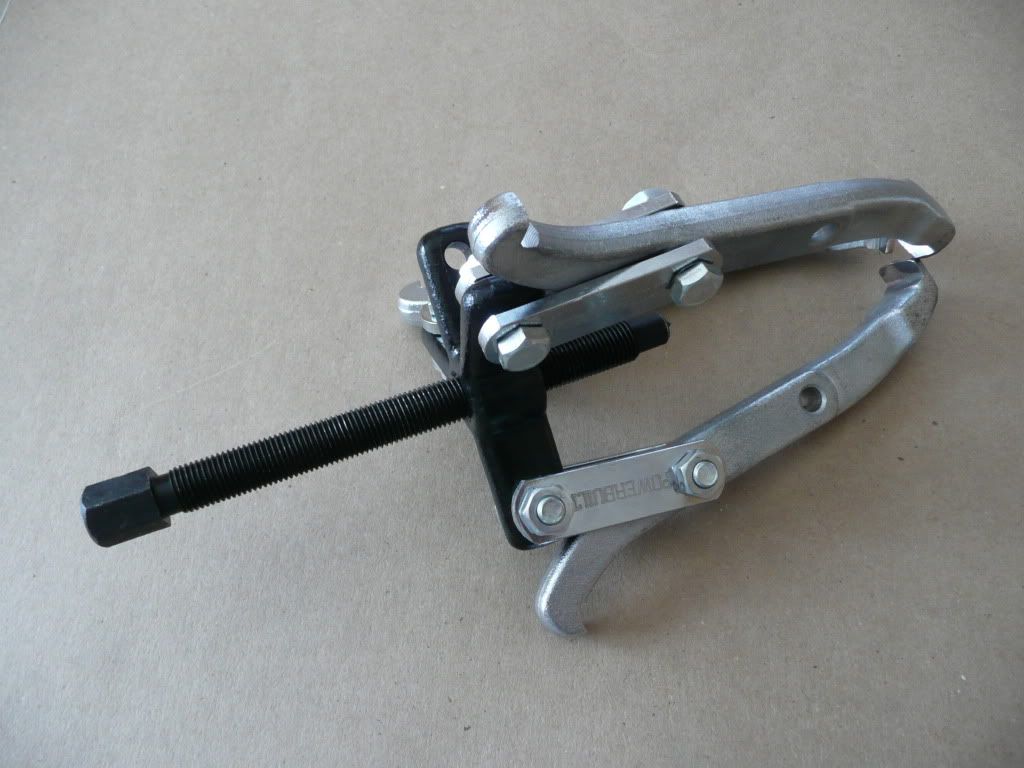
So I resorted to buying a gear puller. I specifically looked for a 3-jaw puller, even though a 2-jaw probably would have been fine; the tricky part was finding one that that a long enough to reach to get to the large bearing. The puller I bought was from Powerbuilt, and has 5 1/2" reach - just enough to read the large bearing. Not a bad price at less than $40 too.
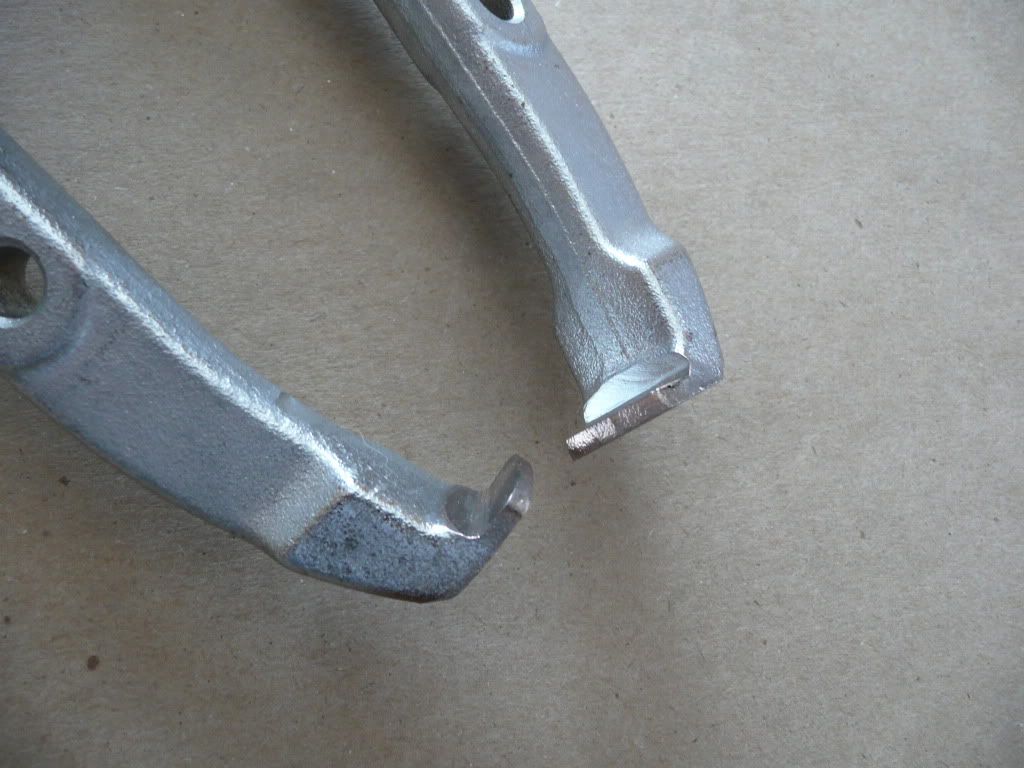
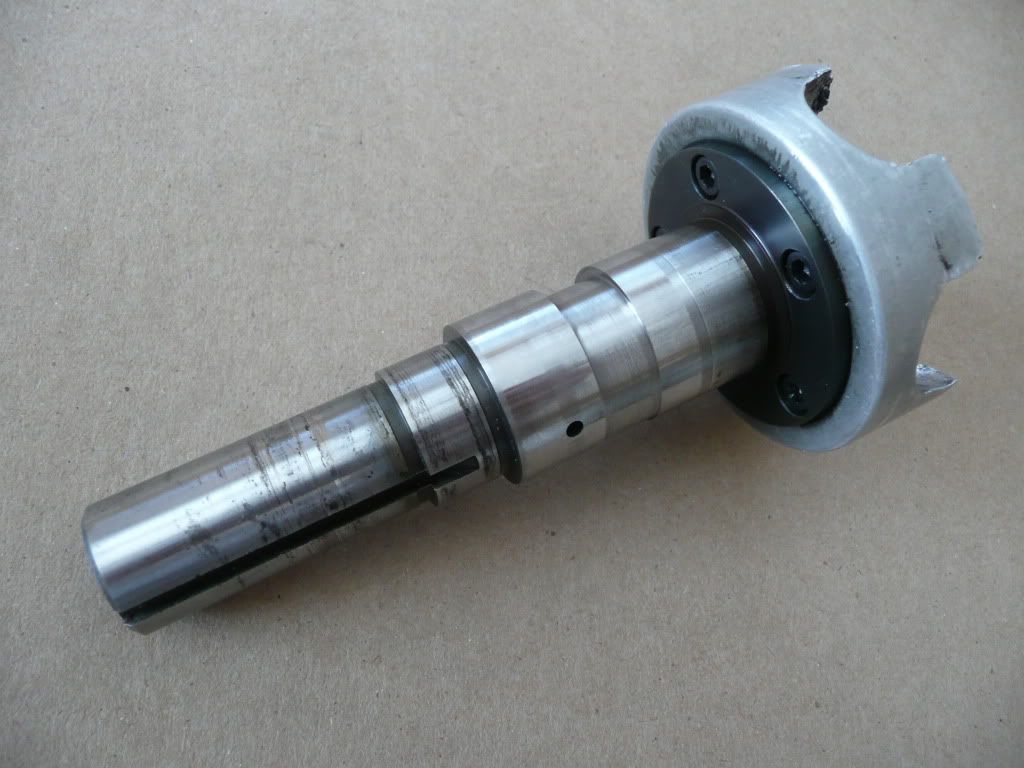
The small bearing came off without any issue, as did the oil pump (I didn't need the puller to remove the oil pump, it came off with simple hand effort). However, because the large bearing is located so close to the drive ball carrier, I had to grind the "teeth" of the puller's jaws in order to get them to fit into the space between the large bearing and the drive ball carrier (shown below).
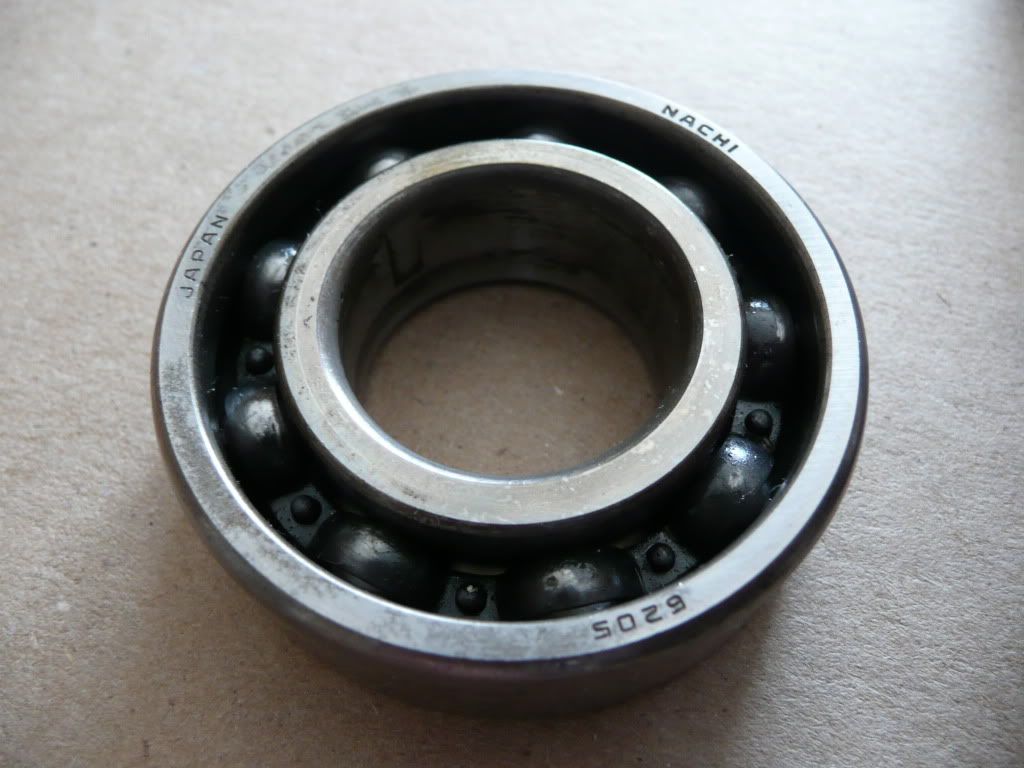
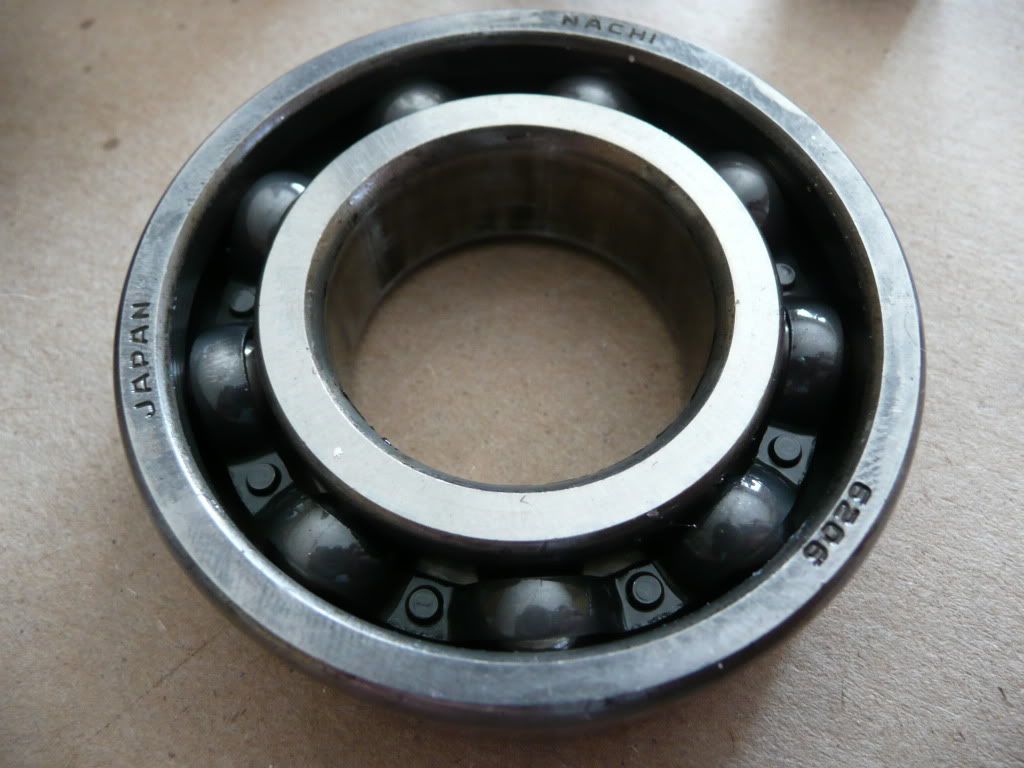
Both bearings are made by Nachi of Japan. The small bearing has the number 6205 stamped on it's side and the larger has the number 6206. Obviously, both of these will be replaced during the rebuild. Oddly enough, there are no prefixes after the bearing part numbers (ie. C2, C3, CN, etc...).
The oil pump appears to be in good shape too, however I will take it apart and inspect it's internal parts as well.
Next, I'm going to remove the drive ball carrier. Looks simple enough - just five allen head fasteners to remove and the carrier should come right off it's mounting plate. The carrier itself is shot, so I'm going to order a replacement unit. Funny... the replacement units are made of brass, yet this one looks to be made of aluminum. I can only assume this is an "original" drive ball carrier as it came from the Paxton factory when the unit was first made.
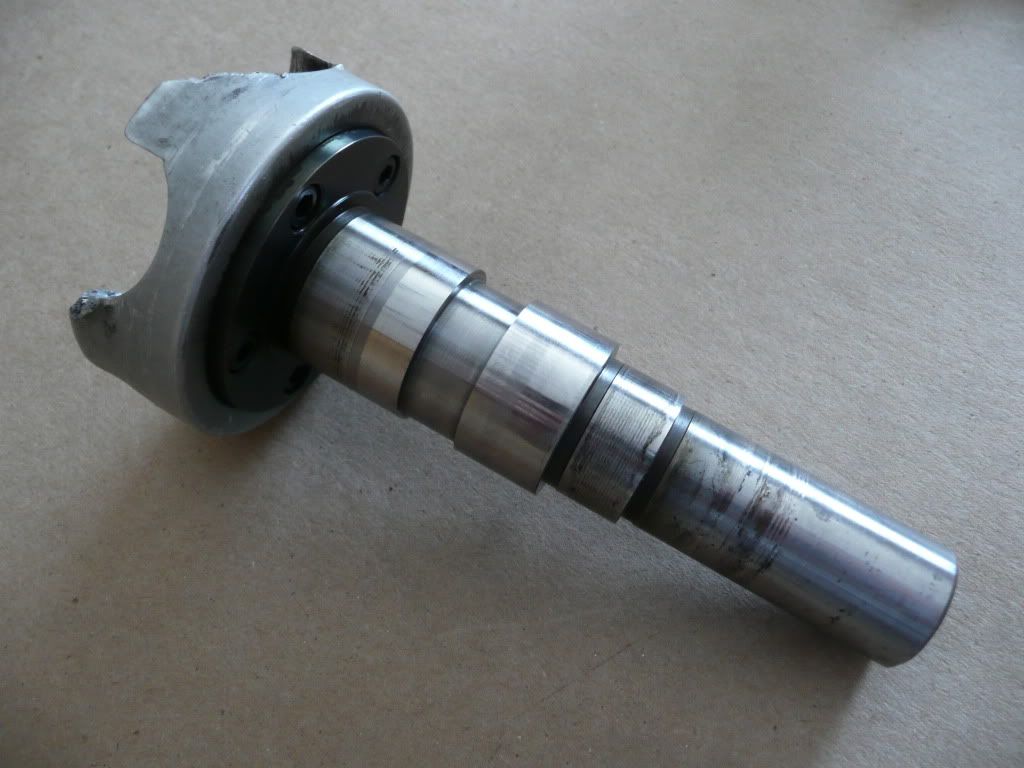
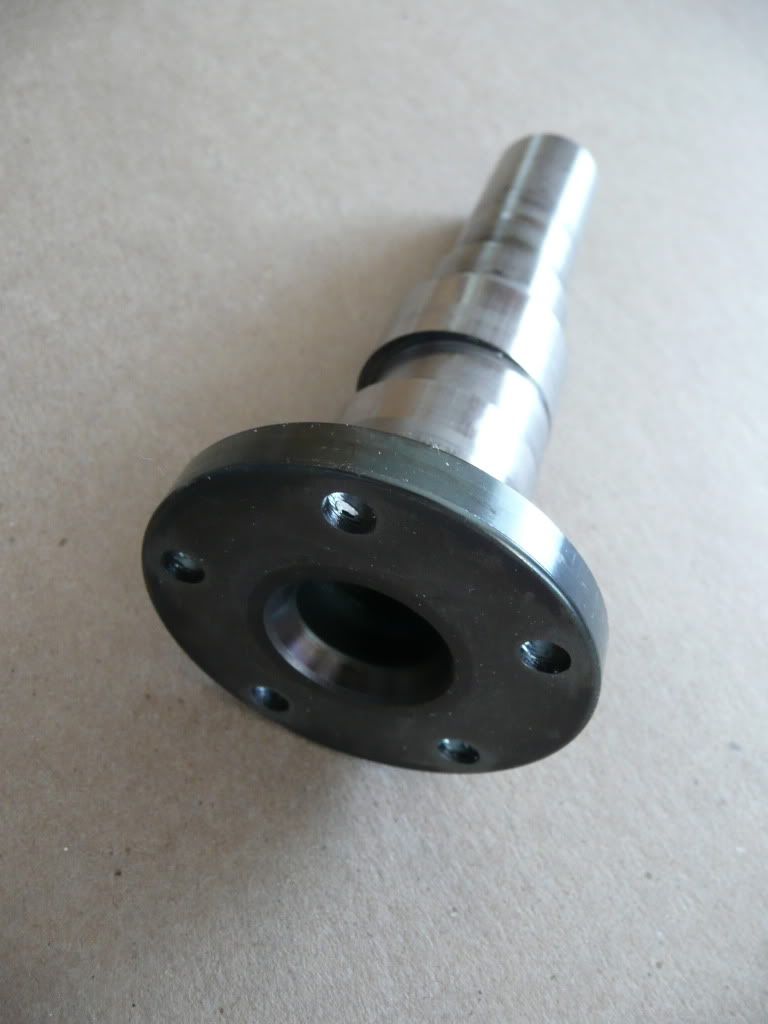
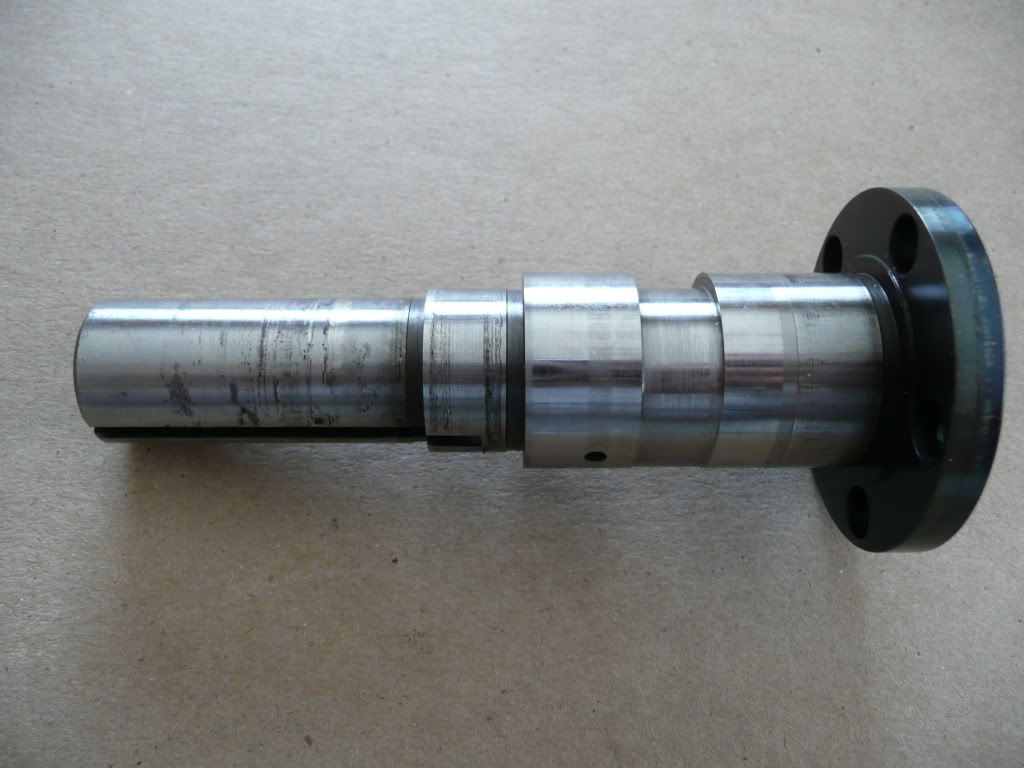
The main drive shaft itself looks to be in decent shape however there are some score marks where the oil seal sleeve used to sit (just forward of the small bearing's location). Do you thing I can reuse the main shaft for this rebuild, or should I order a new shaft?
All the other shaft surfaces look to be in good shape - no scoring or scuffing. And the shaft doesn't appear to be warped either. I'm just not sure if I can reuse it or not... suggestions?
More to come soon.
Michael
www.superchargerhelp.com
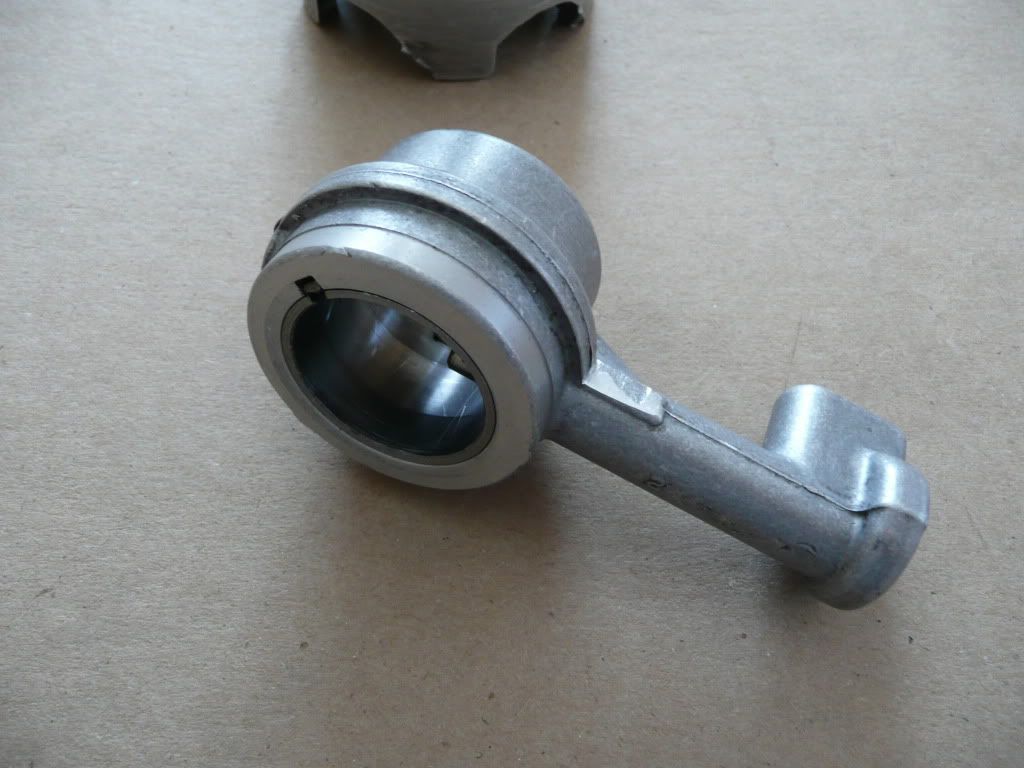
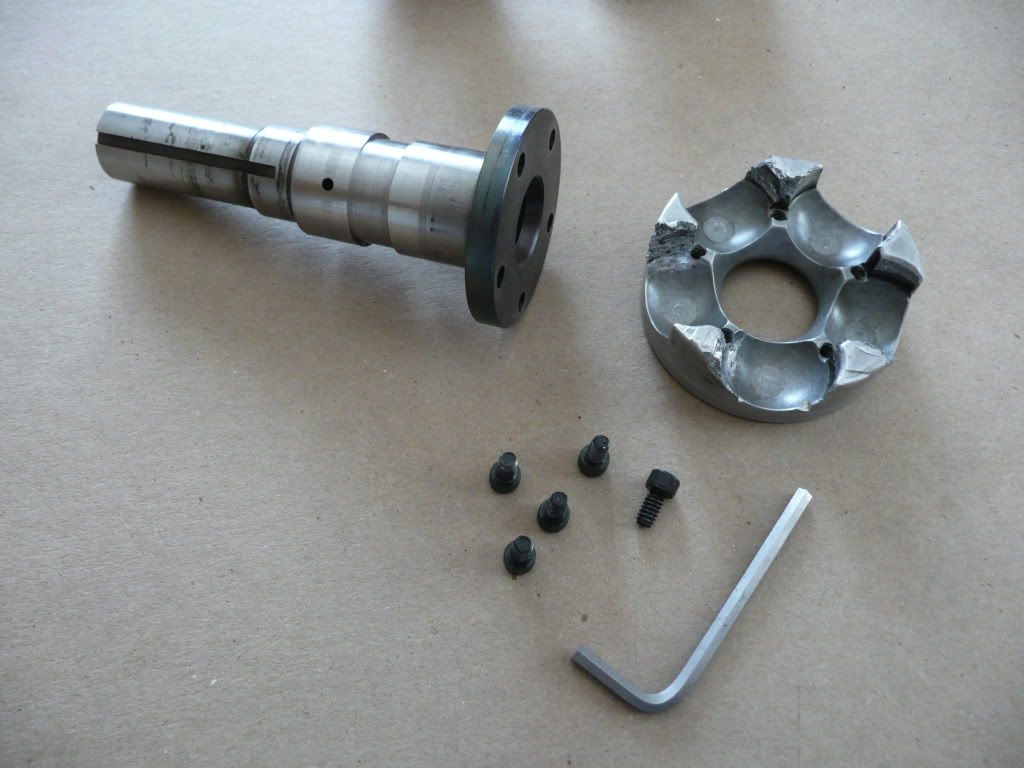
Well... that was easy. 5 minutes with a 4mm allen wrench and the carrier is now off the main shaft.
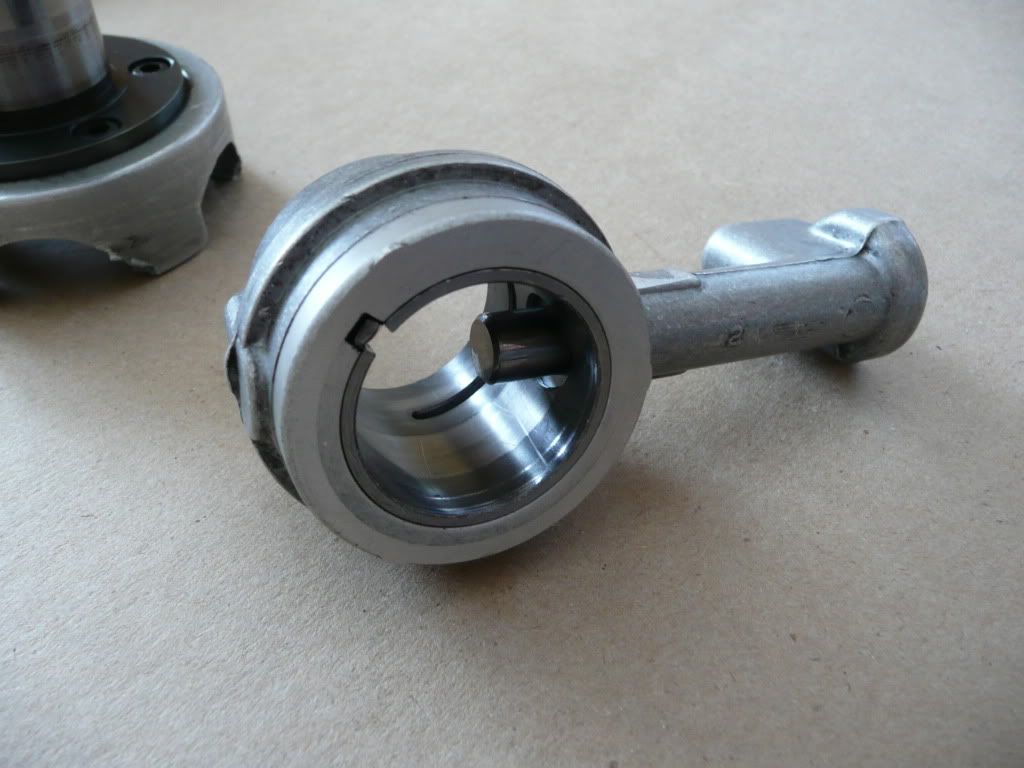
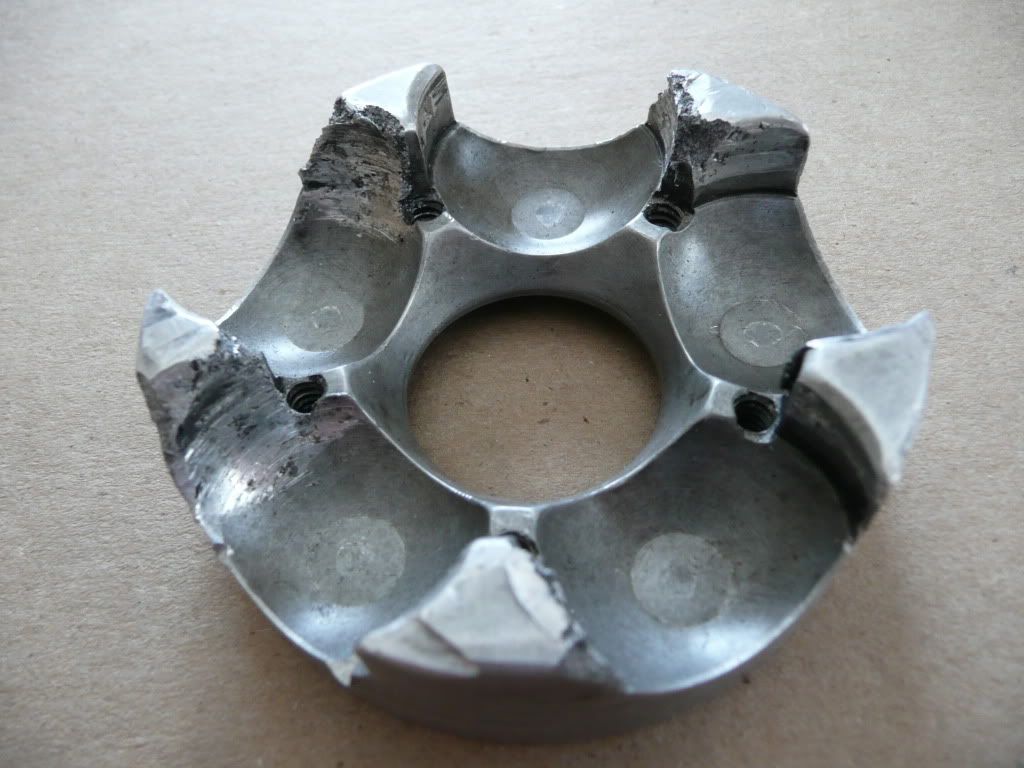
As I mentioned earlier, the ball carrier is completely shot and obviously will need to be replaced. But the photo below will give you a better idea of just how BADLY worn it is. Makes me wonder if this could have been avoided if the previous owner was a bit more diligent with respect to fluid changes while he owned the unit...?
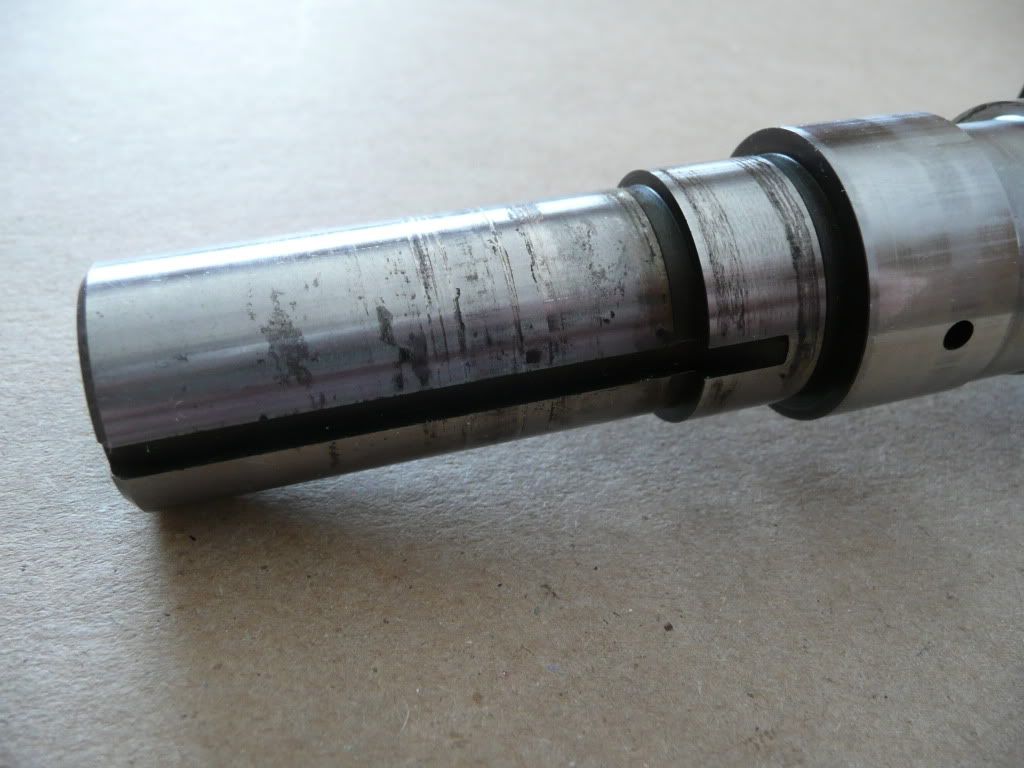
No new surprises with respect to the main drive shaft. But again, the scoring from the oil seal sleeve is still a question mark. There's a closer look at the area in question in one of the photos below.
Again, more to come soon...
Michael
www.superchargerhelp.com
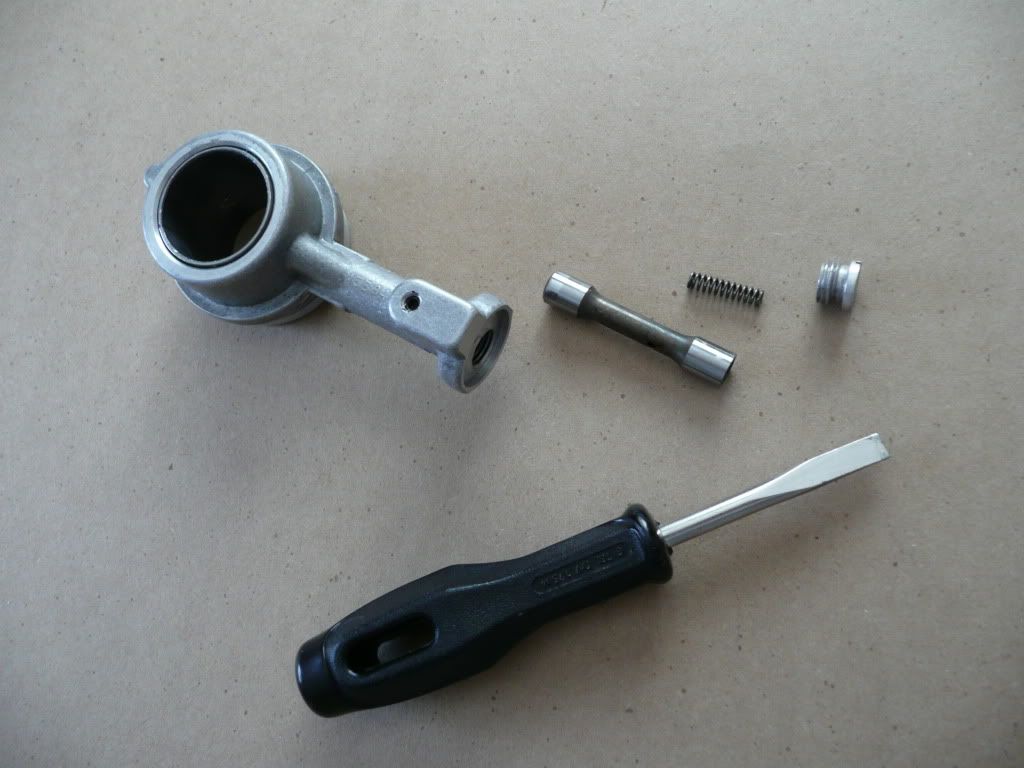
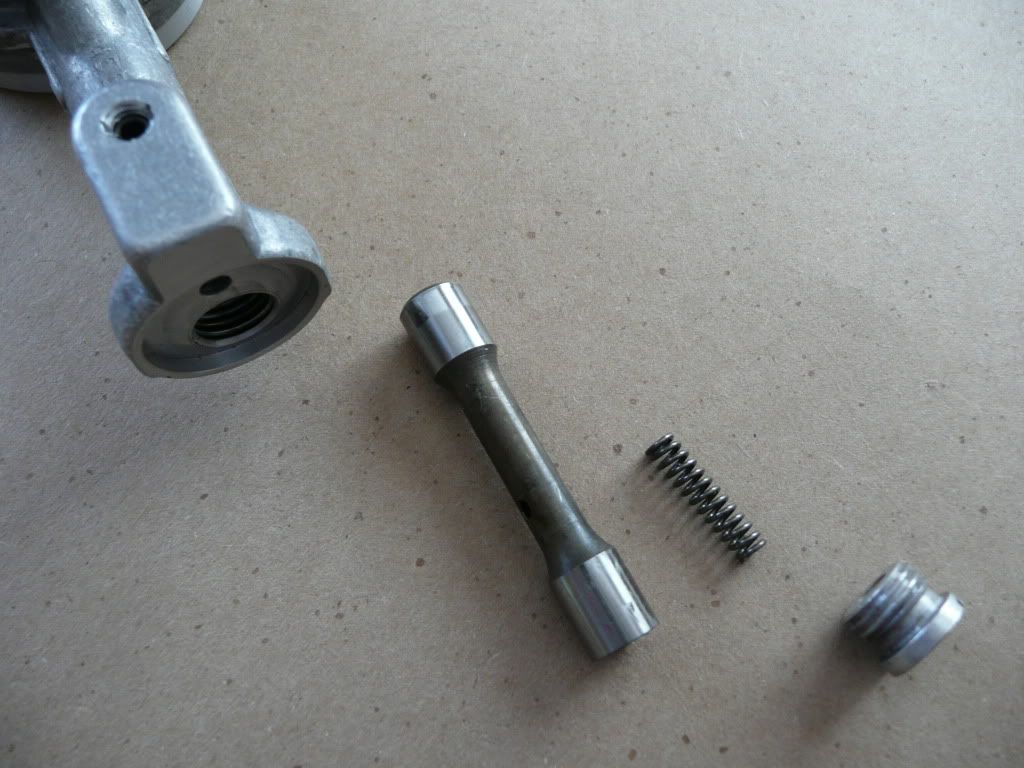
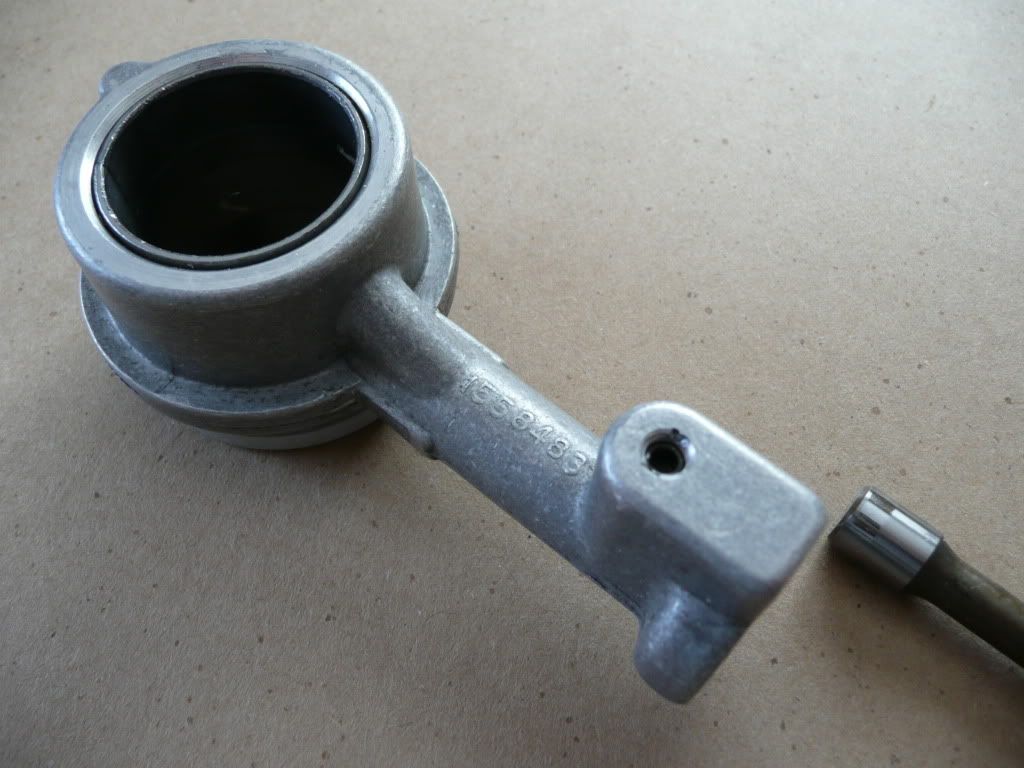
The oil pump is now disassembled. Easily done too - just needed a wide straight-blade screw driver.
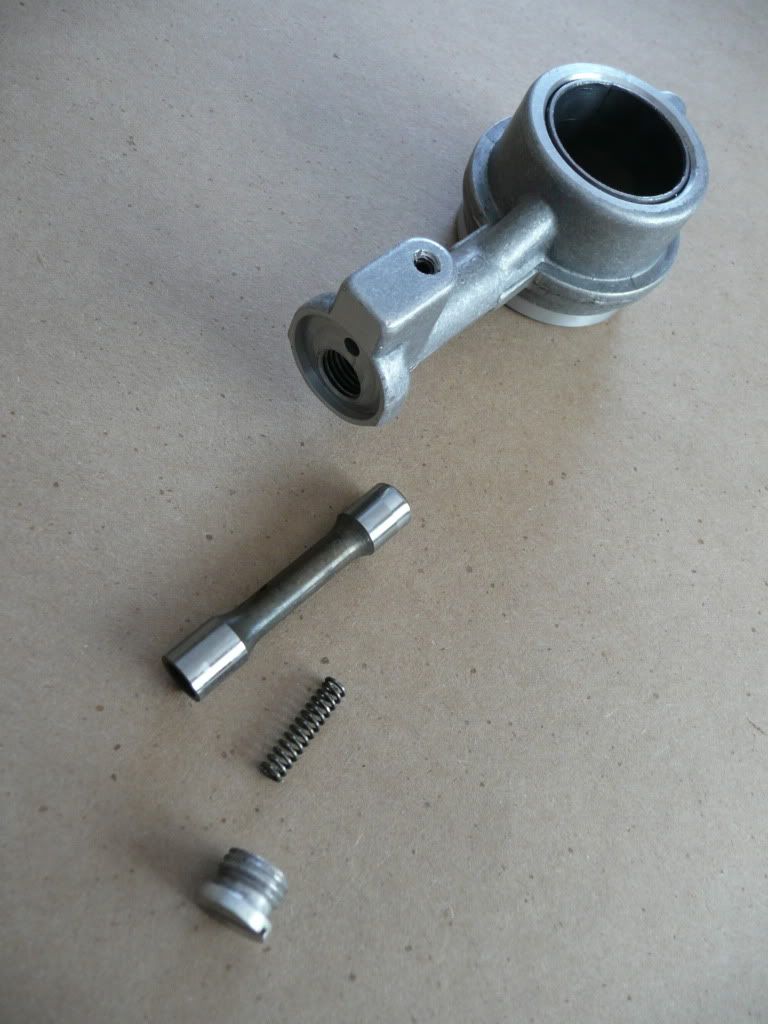
And there's not much to the oil pump either: the pump housing, a screw-in cap, a small spring, and a plunger rod. That's it. Fortunately for me, everything looks to be in good shape too, so I don't think I'll need to replace anything here.
Interestingly enough, I didn't need to remove the small set-screw in the end of the pump's pickup tube. And from everything I've read on SCH, it's unclear as to what it even does.
BTW - does anyone know the torque value to reinstall the screw-in cap at the bottom of the pump's pickup tube when I reassemble the oil pump?
Michael
www.superchargerhelp.com
The main shaft looks fine Michael. Go ahead and clean it up with some Scotch-Brite where the oil sleeve goes.
Last edited by JPJP; 03-15-2011 at 06:00 AM.
Looks like you got lucky getting the shaft out without damaging anything without pulling the oil pump rod first :)
Thanks for the tip re: Scotch-Brite. I was thinking about putting the shaft in a lathe and using some emery cloth on the portion where the oil seal sleeve has caused those score marks. But if you suggest Scoth-Brite, then I'll try that instead.
Michael
www.superchargerhelp.com
Looking back, you're absolutely right. I should have removed the oil pump plunger rod first before sliding the oil pump housing off the main drive shaft.
As you've said, I got lucky I didn't damage the drive shaft or the oil pump plunger rod while I removed the pump. Let's hope I don't make any more of these types of mistakes during the rest of the disassembly (which is almost done) and the reassembly.
Michael
www.superchargerhelp.com
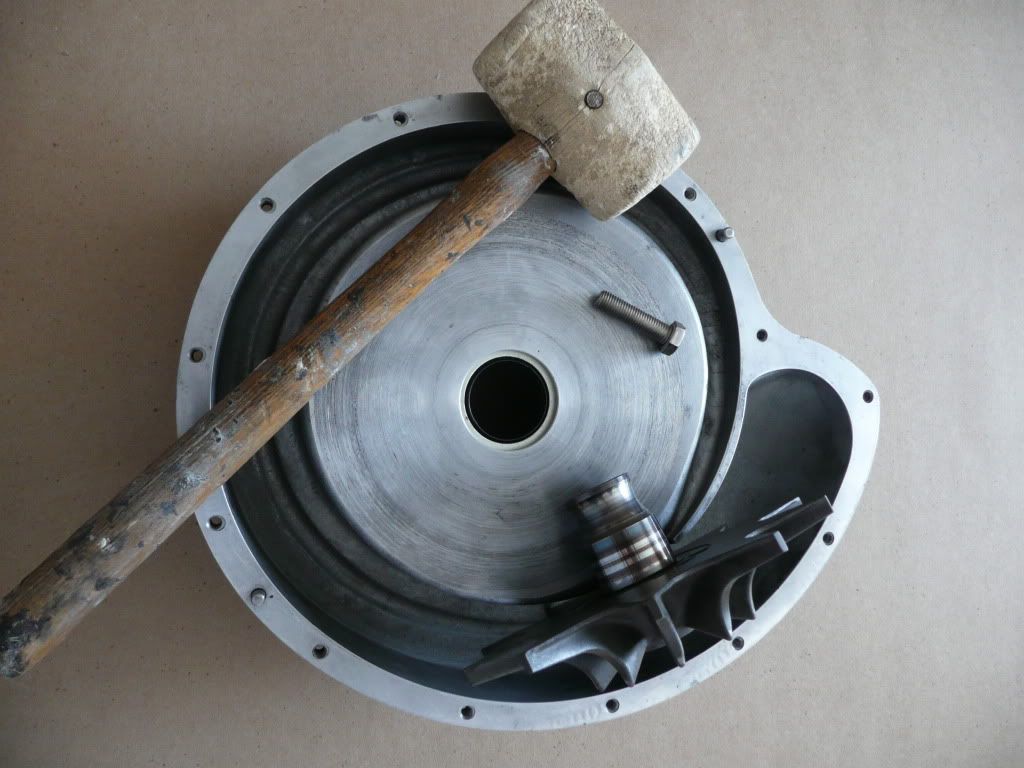
Below is what I did to remove the impeller shaft from the impeller. This is something I did a couple of weeks ago based on Marco's (pavement pounde) suggestion, but I didn't post any photos of it. I thought I'd do that now.
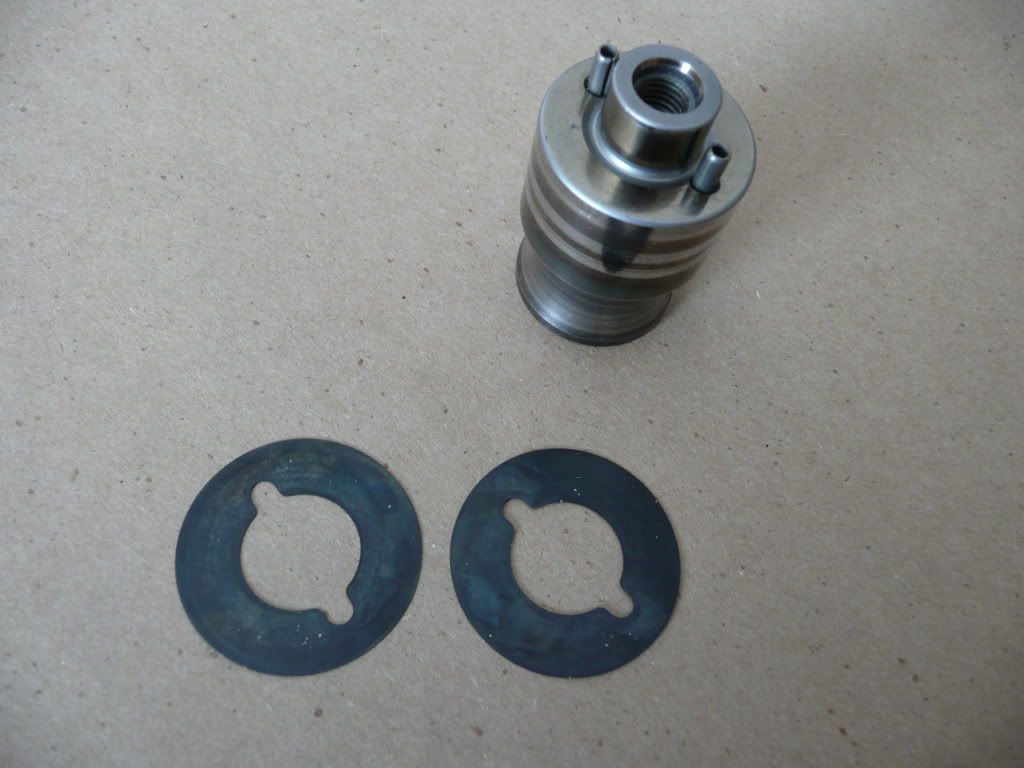
Here's the impeller, impeller shaft, and impeller shims as they came out of the blower. The impeller shaft is a tight (almost press) fit into the impeller itself, which is why I could just simply pull the impeller shaft off the impeller by hand. I'm sure years of heat cycling didn't help the situation either.
In order to remove the impeller shaft, I used the scroll housing (notice the rear oil seal is still installed), the impeller bolt (without the washer) and a rubber mallet.
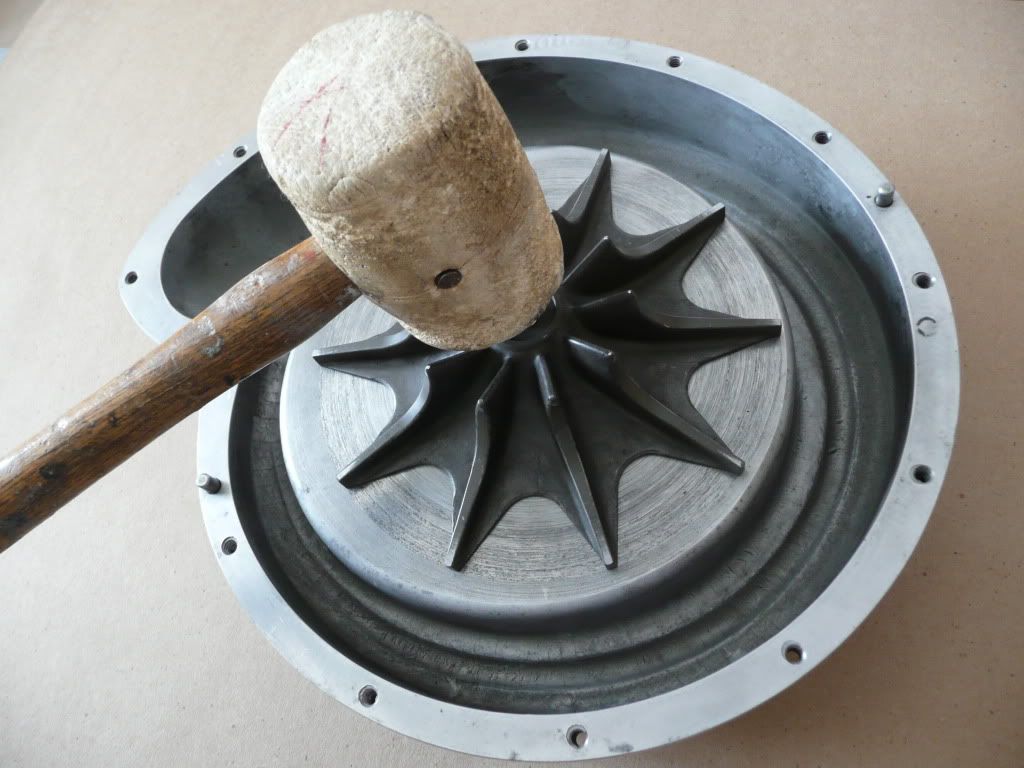
I put the impeller, shaft, and shim assembly back into the scroll as it was installed when I first took everything apart. I then threaded the impeller bolt into the impeller shaft a few turns - not all the way down.
Then, using the rubber mallet I tapped the impeller bolt firmly until I felt the impeller shaft start to move. As per Marco's instructions, DO NOT HAMMER! Tap firmly... the impeller shaft will eventually come out.
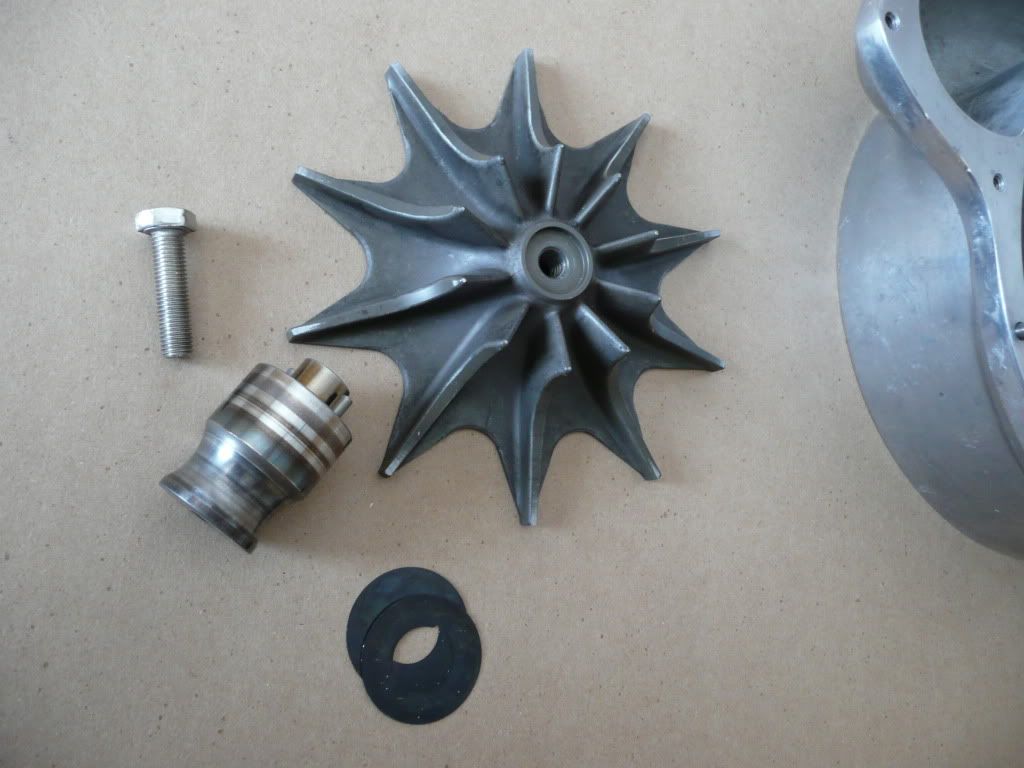
Here's what everything looked like after I removed the impeller shaft and shims from the impeller.
The shims themselves look to be in good shape, but they'll probably get replaced during the rebuild.
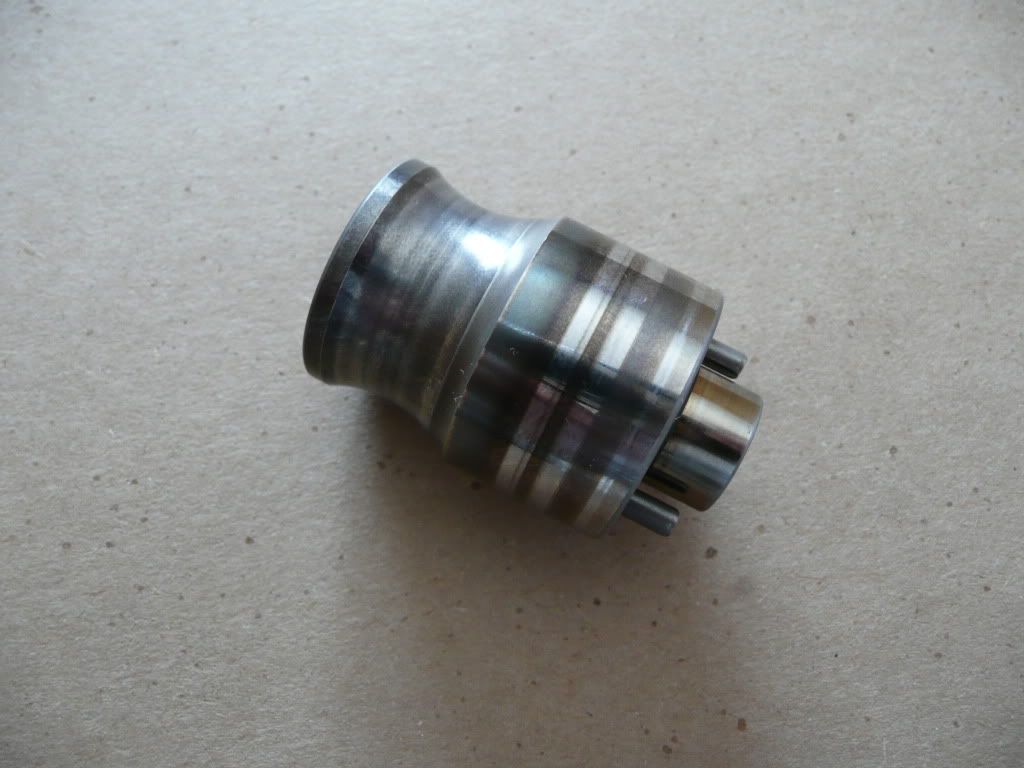
Other than some discoloration, the impeller shaft itself looks to be great shape! No scoring or pitting at all. But I'm guessing it will also have to be replaced during the rebuild as well. Too bad... it looks in good shape considering how badly mangled the drive the ball carrier is... the drive balls themselves are pretty bad too... I'll post photos of those as well.
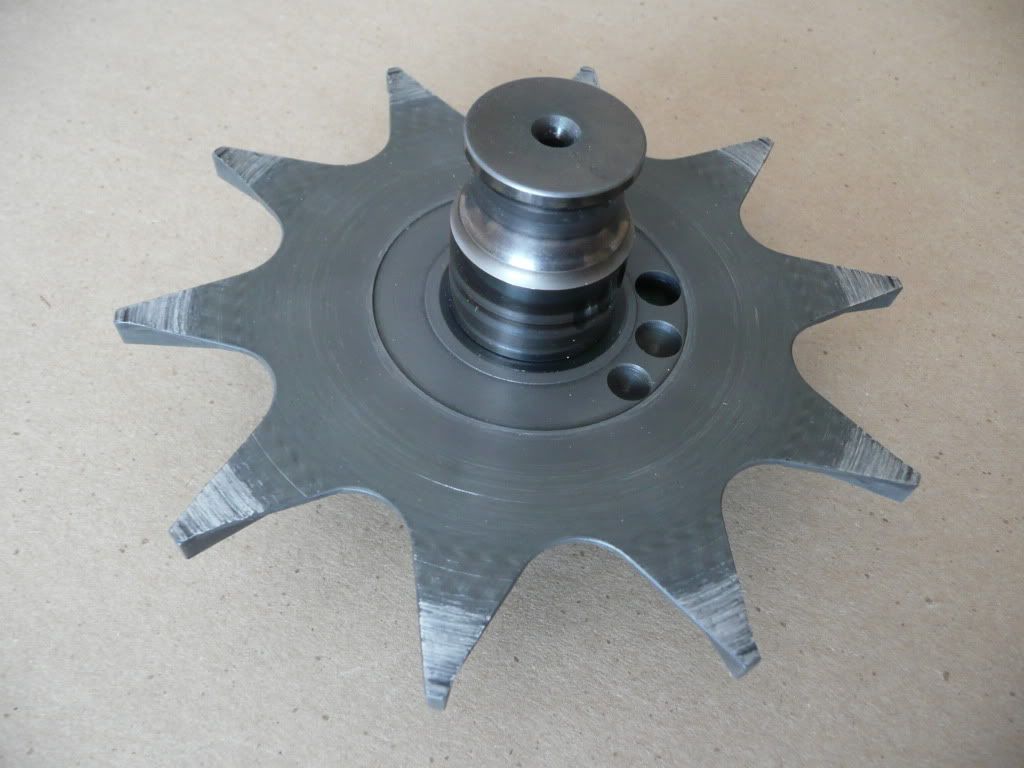
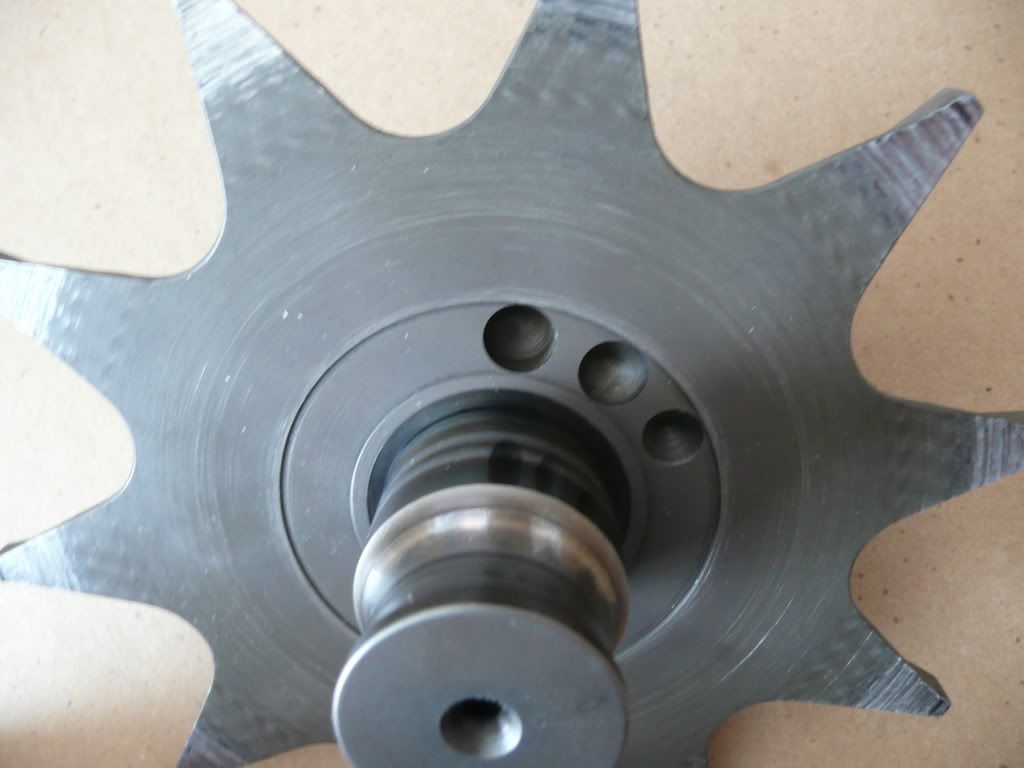
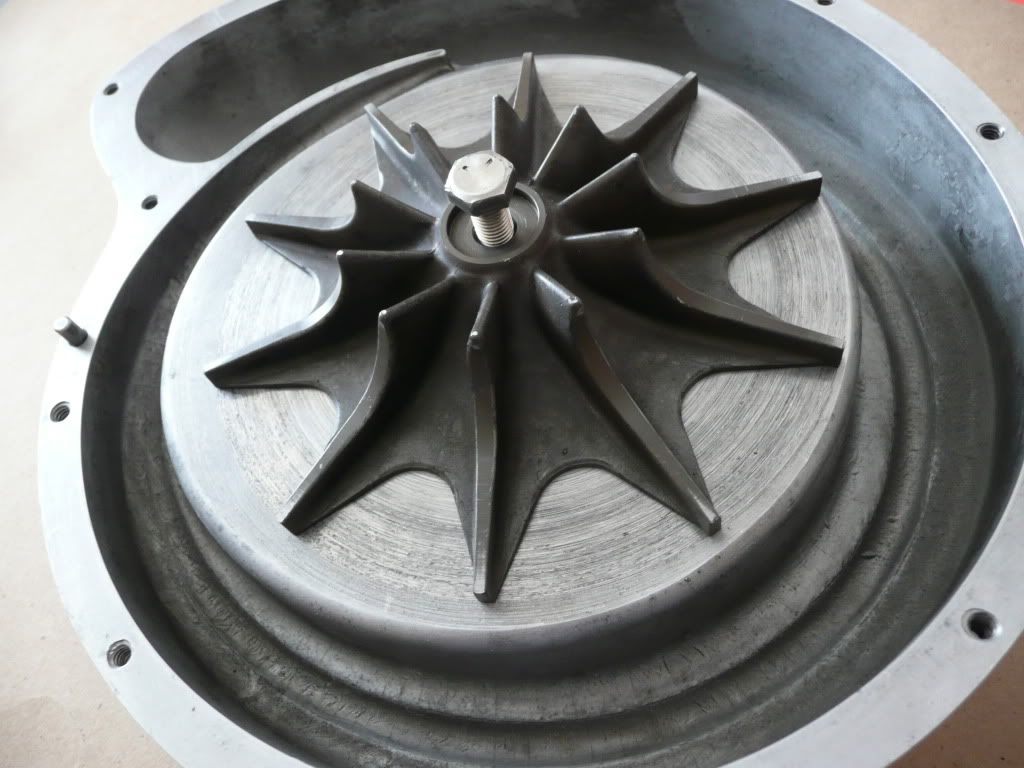
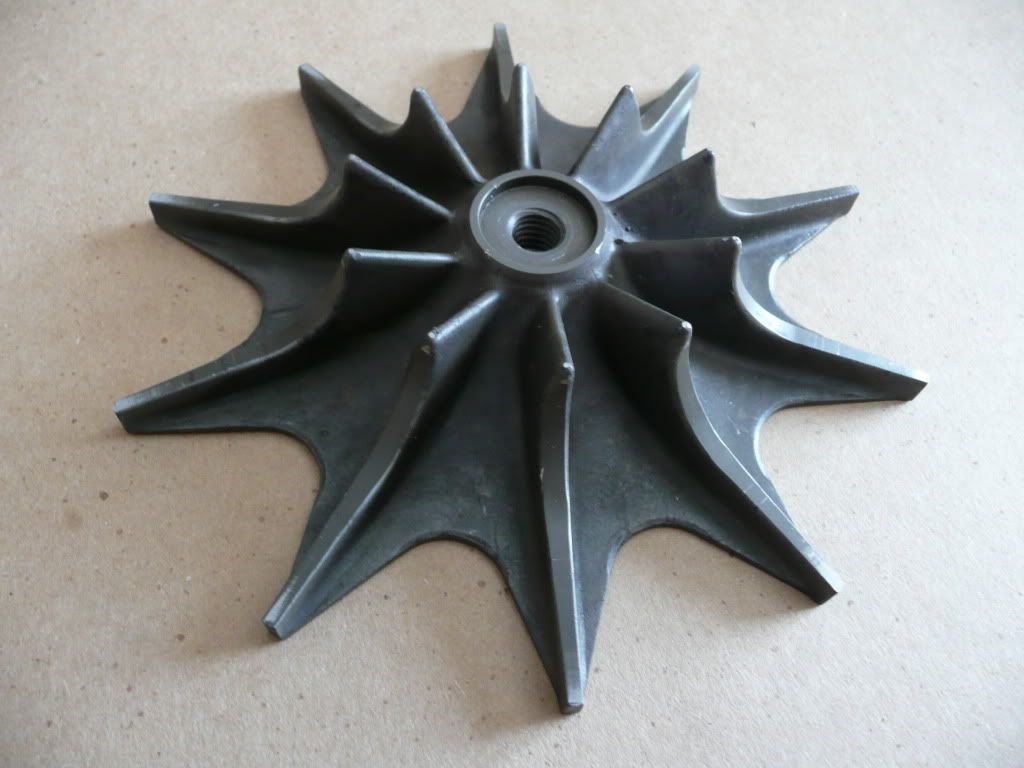
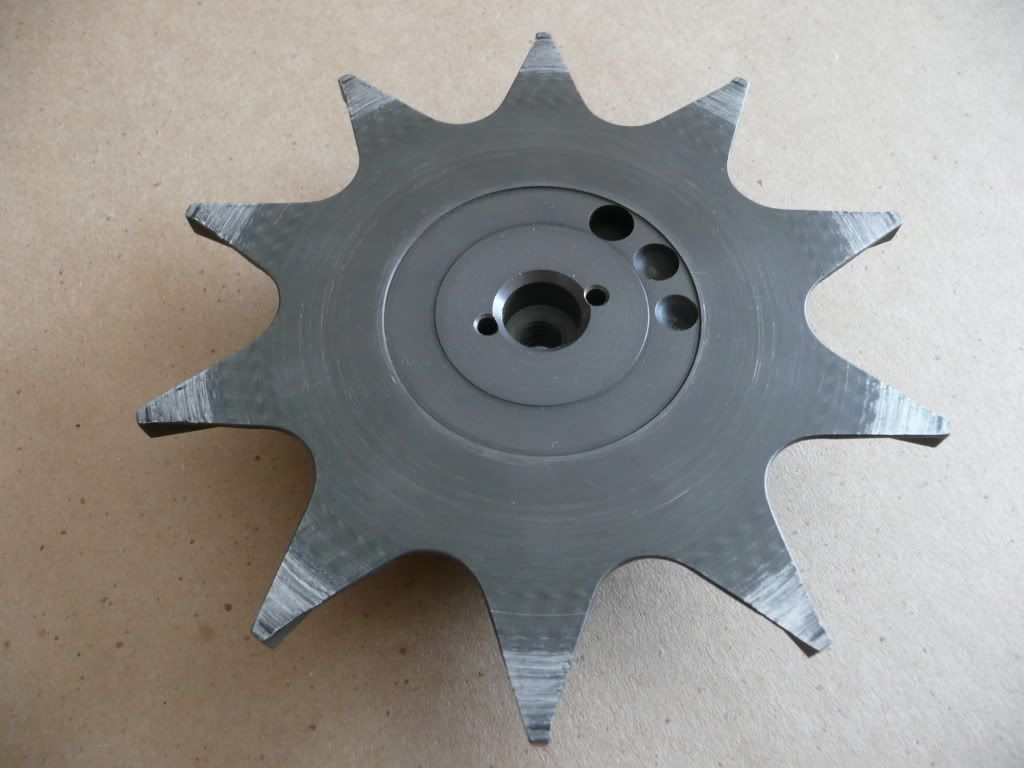
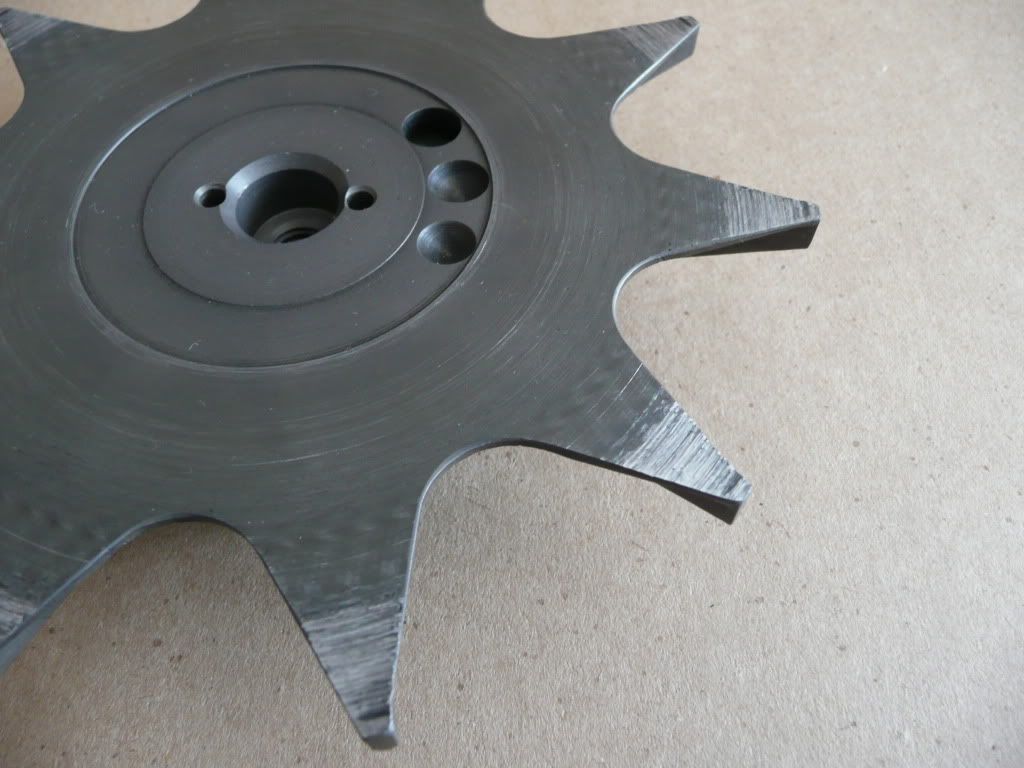
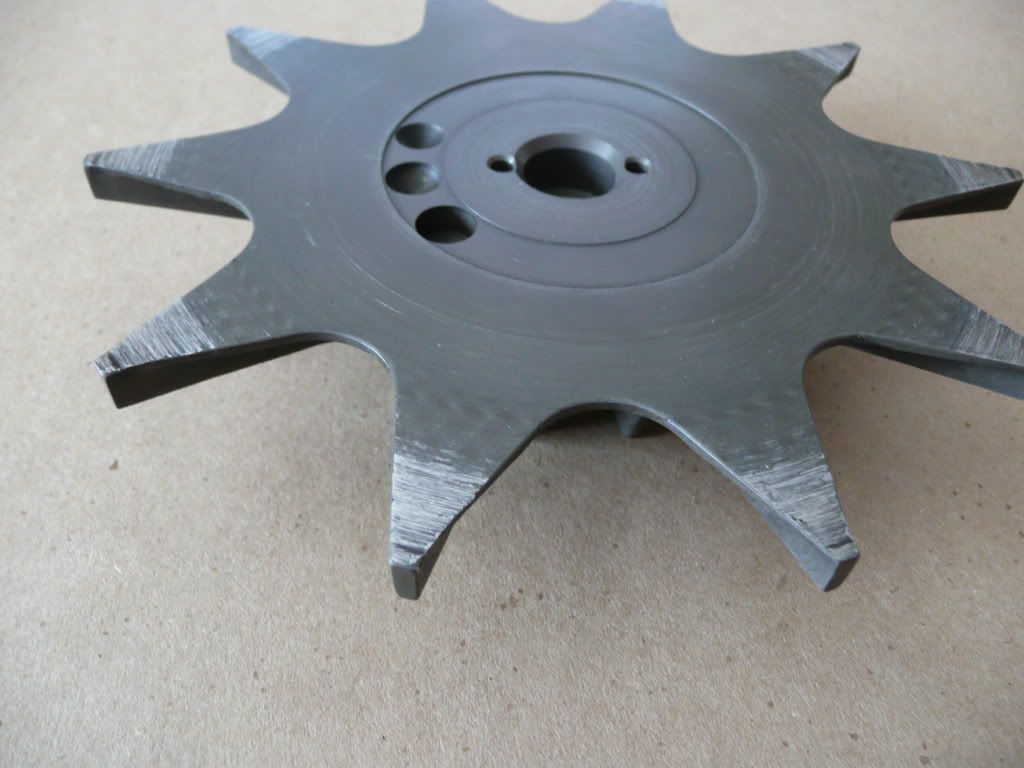
The inlet side of the stock SN impeller looks to be in good shape too with only very slight scuffing along top side of the impeller blades near the tips.
The bottom side, is a slightly different matter. The tips of the impeller blade's bottom surface look to have made contact with the scroll housing itself. I can only assume this is because the impeller wasn't shimmed properly during assembly...? The damage doesn't look too bad, but I'm planning on getting the upgraded "H.O. impeller" for the rebuild so I don't think I'll be reusing this impeller.
I think I'm going to tackle the front and rear oil seals next. I'll post photos when that's done too.
Stay tuned, there's more to come.
Michael
www.superchargerhelp.com
Quoting Michael: "The bottom side, is a slightly different matter. The tips of the impeller blade's bottom surface look to have made contact with the scroll housing itself. I can only assume this is because the impeller wasn't shimmed properly during assembly...? The damage doesn't look too bad, but I'm planning on getting the upgraded "H.O. impeller" for the rebuild so I don't think I'll be reusing this impeller."
I believe the tips were hitting the scroll housing because the ball carrier was so badly damaged that the balls were no longer riding true on the races. Thus causing the impeller shaft to move at the mercy of the uncontrolled balls - moving in and out against the scroll housing.
Any other theories?
What do the races look like Michael?
 Posting Permissions

 Reply With Quote
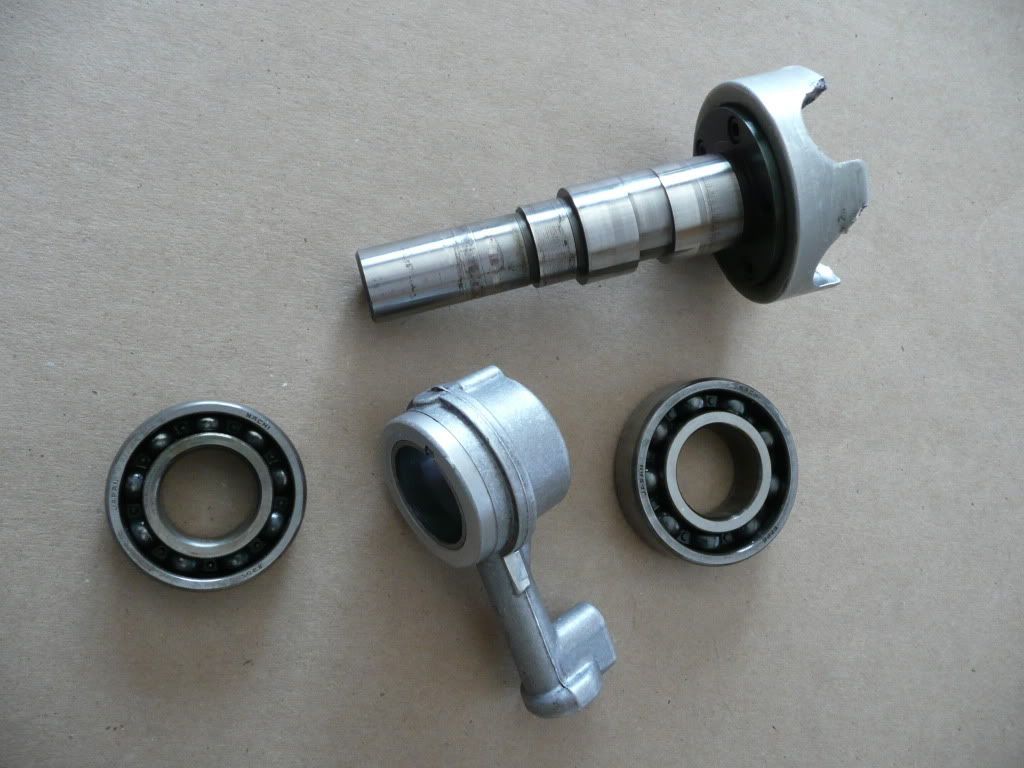


Bookmarks