Warning: preg_replace(): The /e modifier is deprecated, use preg_replace_callback instead in ..../includes/class_bbcode.php on line 2958

Warning: preg_replace(): The /e modifier is deprecated, use preg_replace_callback instead in ..../includes/class_bbcode.php on line 2958
SN92 Strip Down Inspection.
Page 1 of 2 12 LastLast
Results 1 to 15 of 22

Thread: SN92 Strip Down Inspection.

  1. #1
    Junior SCH Member Blown V8 Capri's Avatar
    Join Date
    Feb 2010
    Location
    UK
    Posts
    27

    Talking SN92 Strip Down Inspection.

    Hi guys,
    i have a used sn92 unit we bought to go onto our car this year,
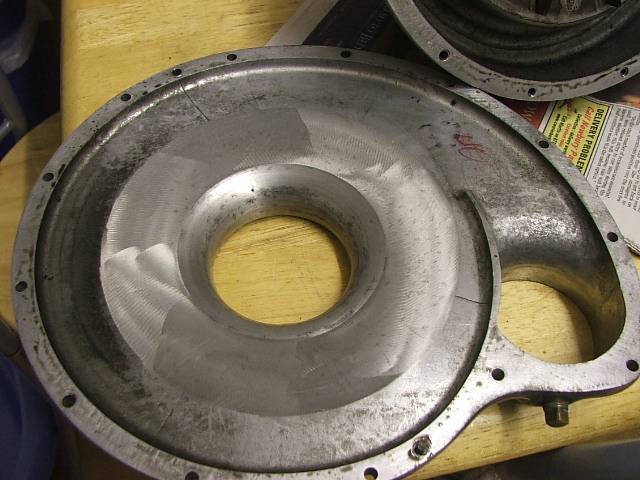
    is there a step by step guide on how to dismantle and what to inspect while apart?
    is it a case of undo front and rear bolts and it pulls apart?
    or is there retaining clips etc to remove on the shaft?
    Had a quick search on the site and not found anything regarding this,
    thanks for a great site

  2. #2
    SCH Moderator "SN Guru" speedytang's Avatar
    Join Date
    Dec 2002
    Location
    Marengo, Ohio
    Posts
    2,028
    Just take out the case bolts and separate. A large o-ring seals it. Check the impeller shaft and make sure it is smooth and no nicks. Take a micrometer and make sure all the balls are the same size and have no nicks or grooves. Check the housing section that covers the impeller and makes sure the case has no impeller nicks. If the case has impeller nicks and the impeller shaft looks good then the balls are worn and no need to inspect them just get new ones.

  3. #3
    Junior SCH Member Blown V8 Capri's Avatar
    Join Date
    Feb 2010
    Location
    UK
    Posts
    27
    Ta speedytang,
    will attack this later,

    do i have to sorce the parts from the USA?
    or can i source non O/E parts here in the UK? seals etc,

    also wheres the best place to get a dip stick from???
    mines missing,
    unless someone wants to measure up theres etc, as i will make one at work then,

  4. #4
    Junior SCH Member Blown V8 Capri's Avatar
    Join Date
    Feb 2010
    Location
    UK
    Posts
    27

    Cool

    here we go, took it apart as you said, was surprised how easy it was,

    do i have to remove the balls to check them etc, if so how do you do that??

    heres a few pics,

    The charger,


    thanks for the help guys.

  5. #5
    Senior SCH Member pavement pounde's Avatar
    Join Date
    Nov 2004
    Location
    Netherlands
    Posts
    715
    You need to losen the impeller bolt, (locktide inside) then the bolts will drop.
    The brass ball carier as well as the 1 ballrace look good enough to reuse.
    Greets, Marco
    '91 Chevy 496SS, Edelbrock Pro-flo 2 injection, alu. GMPP heads, blowercam, coolmist water injection, turbo in the works.
    *VIDEO* http://www.youtube.com/watch?v=6ZOdXg0TOdw

  6. #6
    Junior SCH Member Blown V8 Capri's Avatar
    Join Date
    Feb 2010
    Location
    UK
    Posts
    27
    Thanks Marco.

    just dipstick details to sort out now and we should be near ready to go :-)

  7. #7
    Junior SCH Member
    Join Date
    Nov 2009
    Posts
    22
    I have a Gss which looks the same as yours I will measure it for you tomorrow as post up the length

  8. #8
    Junior SCH Member Blown V8 Capri's Avatar
    Join Date
    Feb 2010
    Location
    UK
    Posts
    27
    Cheers Magnumpower,
    would be handy as will get one made at work on the lathe then,
    any dimensions etc even a rough drawing what it looks like with sizes scribbled on would help mate.

    thanks again,

  9. #9
    Junior SCH Member
    Join Date
    Nov 2009
    Posts
    22
    No problem Im also in the Uk :)

  10. #10
    Junior SCH Member Blown V8 Capri's Avatar
    Join Date
    Feb 2010
    Location
    UK
    Posts
    27
    Ah a fellow Britt

  11. #11
    Senior SCH Member pavement pounde's Avatar
    Join Date
    Nov 2004
    Location
    Netherlands
    Posts
    715
    Are the Europeans taking over this great forum ? :)
    Greets, Marco
    '91 Chevy 496SS, Edelbrock Pro-flo 2 injection, alu. GMPP heads, blowercam, coolmist water injection, turbo in the works.
    *VIDEO* http://www.youtube.com/watch?v=6ZOdXg0TOdw

  12. #12
    Senior SCH Member
    Join Date
    Oct 2005
    Location
    CHICAGO SUBURBS
    Posts
    191
    I took my dipstick and modeled it up and whipped up a drawing for you. Dim's are in inches. The Brit's will have to convert.

    Material is whatever you choose. Stainless may look nice. Aluminum (Aluminium for the Brit's) may be too weak but will probably help dissappate heat better.
    Attached Files Attached Files

  13. #13
    Junior SCH Member Blown V8 Capri's Avatar
    Join Date
    Feb 2010
    Location
    UK
    Posts
    27
    thank you very much JPJP.

  14. #14
    SCH Owner Michael's Avatar
    Join Date
    Aug 2005
    Location
    The Motor City
    Posts
    1,373
    Quote Originally Posted by Blown V8 Capri View Post
    wheres the best place to get a dip stick from???
    mines missing
    I purchased a dipstick from CUNDN Racing via their eBay store. The price was very reasonable and saved me the trouble of having to make one myself. Could be an option to consider.

    Here's a link: Paxton SN / GSS dipstick

    Hope that helps.

  15. #15
    Junior SCH Member
    Join Date
    Nov 2009
    Posts
    22
    Here You go capri here is what I came up with all measurements in MM but it looks like I have been beat to it LOL Not quite as good as the pdf drawing :)

    001.jpg
    Attached Images Attached Images
    Last edited by MAGNUMPOWER; 02-17-2010 at 06:32 AM.

Posting Permissions

  • You may not post new threads
  • You may not post replies
  • You may not post attachments
  • You may not edit your posts
  •